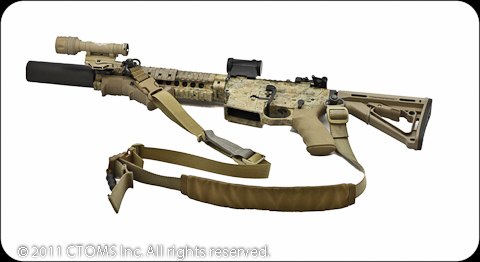
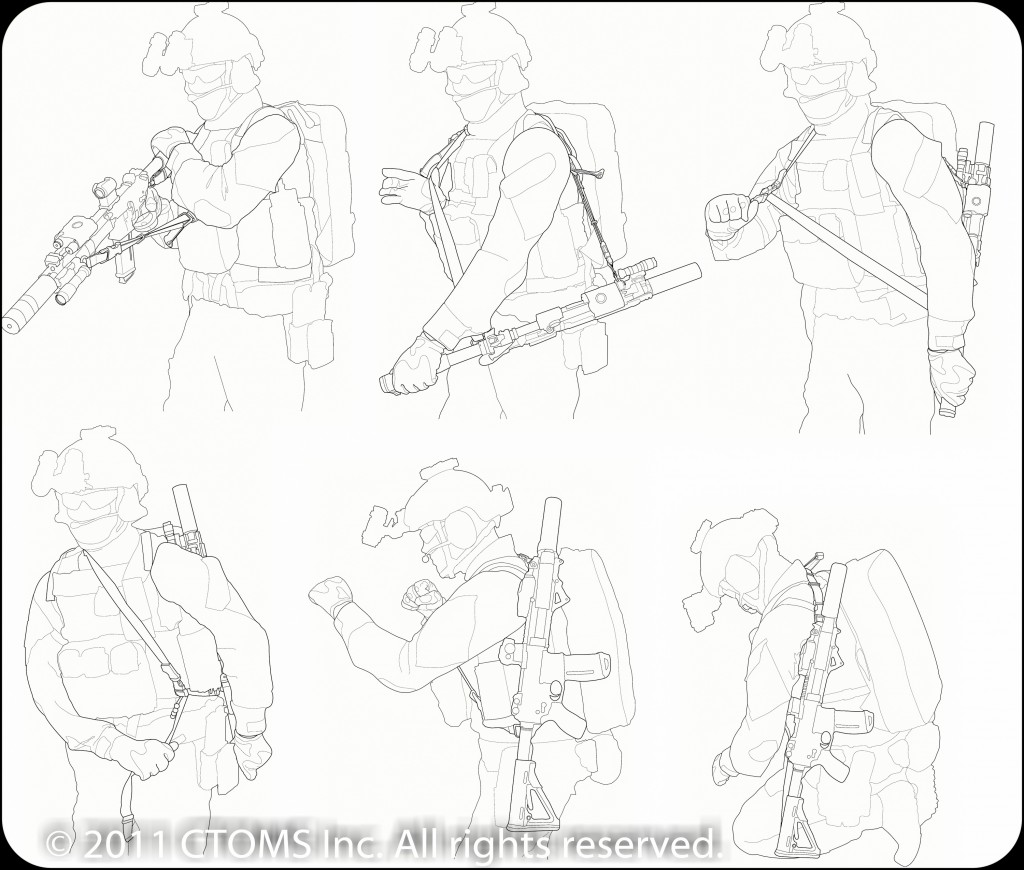
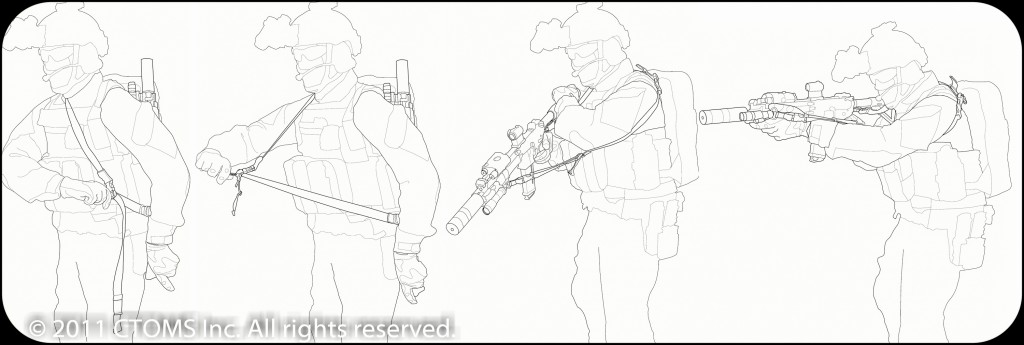
I know you wouldn’t believe me if I told you, but too many times in training I’ve seen medic’s leave their weapons in the CCP (Casualty Collection Point). The weapon gets set down on the ground and the medic becomes so focused on their casualty, when it comes time to move them to the CASEVAC, they forget about their rifle. Yes, you can put the weapon on the back of your legs when you kneel, which is a decent trick. But that only lasts so long before too much movement around the casualty requires it to be moved off. It also doesn’t solve the problem of properly slinging the weapon for secondary tasks like climbing. So to get to the point, just like the scissors, we need to tie them off. The trick was making a rifle sling that was functional in all aspects. Realizing that not everyone’s job is strictly shooting, the sling needs to have added function, without compromising performance and without being over complicated.
Like all gear configuration, it’s been an evolutionary process of trial and error to figure out the best rifle sling set up for my particular needs. That need is a sling that is both effective at weapon retention and control, but also one that will easily secure the weapon on my body, out of the way when I need to perform a secondary task, like climbing or kneeling. When in that secured mode, it needs to be readily accessible to bring back on target.
There is the age old debate of 1 vs. 2 point slings. I went with the 2 point sling as 1 point slings have disadvantages for my requirements, particularly no effective and controlled way to secure the weapon in order to perform secondary tasks. I don’t like the weapon flop. The worst is the likelihood of a muzzle to ground/casualty strike, usually right in their face, probably the teeth. Maybe the eye. If they’re lucky, the forehead.
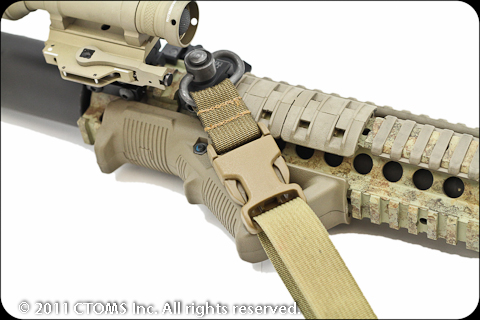
Front Attachment
I have friends that mount their sling just in front of the receiver, as far back on the rail as possible, so I tried this first. This didn’t work for me because when I tried to sling the weapon on my back, barrel up, there wasn’t enough support at the top of the weapon and it would swing around considerably. I moved the attachment point far forward and it ended up working extremely well. When I slide my hand forward into a shooting position, the web of my thumb hits the sling attachment point and I know it’s in the correct spot. I then grip the front of the weapon.
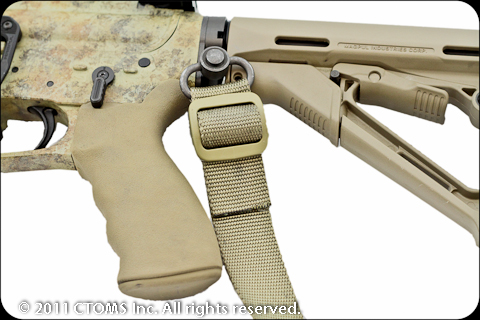
I’ve also did a personal modification to the stock sling of sewing it to the button sling swivel. (For everyone’s info on the stock C-Sling, it is essential to double back the webbing through the tri-glide or you risk dropping the weapon. The new C-Sling™‘s are using 4088 webb instead of 17337 in this location which adds friction and reduces the likelihood of that locking bite from working its way out.)
We used narrow 1″ webb at the front to reduce bulk and weight. At the point it goes over the shoulder we used a 1.25″:1″ reducer to add width for comfort.
Adjustment
The adjust-ability at the front can be configured for a pull to tighten or push to tighten depending on your preference. Pictured I have it set up for pull to tighten. I like being able to push away and have it loosen. It is more intuitive to me, but the option is there. The front adjustment is on a 2:1 mechanical advantage. That means you push or pull 2″ and it tightens or loosens it by 1″. The advantage to this is no free flopping tail. Generally you don’t need to make a huge adjustment on the front to secure the weapon down anyway.
On the front doubled section of webb there is a small rectangle buckle to keep the webb together without adding friction. The pull tab is quadrupled webb to add stiffness and a contrasting color for faster identification.
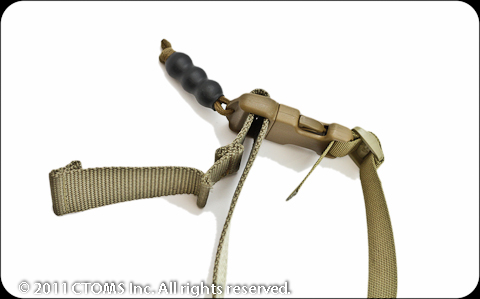
The rear adjustment however does have the free flopping tail when tightened because it is on a 1:1 tightening system. This gets it snug, and fast, to secure it on the back. Yes there will then be a long running end, but that is the compromise. We T&E’d a 2:1 systems on the back and they simply didn’t tighten it effectively enough. The pull tab is a blocked section of the end of the webbing to make it stick out. To release it, there is a beaded pull. 5 beads come stock. You’ll see I reduce mine down to 3 and as another personal modification, I heat shrink wrap all my beaded pulls. I’ve seen where guys have the sling on their back with the back section already cinched up. Obviously not having read the POG (Performance Optimization Guide) that comes with the product. This is defeating the purpose of the sling, so it is important to have the rear section loosened so that the pull tab butts up against the ladder lock of the 1.25″:1″ reducer side release buckle. That way when you swing it around back to tighten it, there is plenty of room to tighten, and it keeps the running end as short as possible.
Rear Attachment
The rear attachment is nothing fancy. I prefer it at the sling plate location as opposed to the end of the butt. Mine is mounted to a swiveling button receptor and it works extremely well for me. This allows a very quick transition to reaction side (off-sided) shooting position without choking myself out! If the sling is mounted at the rear of the butt and this is done, the webbing runs right across your neck.
Fitting Adjustment
Sizing it when you first get it is the most important thing you can do. The webbing on these slings comes loooong for the big boys with barrel chests and lots of gear on their plate carrier. The hope is that, (like I did pictured here), after it is sized, the webbing (both 1″ at the center and 1.25″ at the end) is cut to size so there is no excess webbing to come unstowed and fowl you at the most inopportune time. I’ve even removed the elastic keeper because I got rid of all the excess webbing to make the sling as clean as possible.
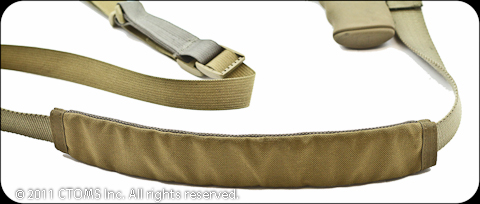
C-Sling™ PS (Padding System)
This is nice because it is a retrofit. You can add or remove if you please and the nice thing is, it doesn’t take away from functionality. When tightening down the rear of the sling, you can ‘squish’ the padding to get the sling really tight. You can also adjust the specific position of the sling depending on sizing. Once placed on the shoulder, it stays put on your shoulder and the webbing slides through it if you move the rifle around.
QR Prevention Straps (Not Pictured)
These aren’t available quite yet, but are currently in production. Some guys didn’t like the side release buckles on the sling as they didn’t trust them to stay put. These are small straps that secure the side release buckles closed. When they are not used, you can hit either front – weapon forward, or the rear – weapon is slung, side release buckle to get out of the sling should it become fouled on something. The QR Prevention Straps would prevent this ability so it is completely up to the end users preference. These will be sold as an accessory. A Cobra buckle conversion kit is also possible depending on customer demand.
Under PFD
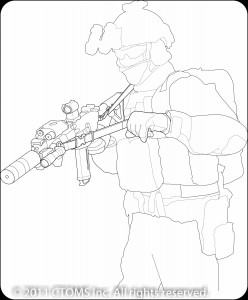
For marine interdiction, or anything where a PFD needs to be worn, the sling should be guided under the PFD to prevent any interference should it need to be activated.

